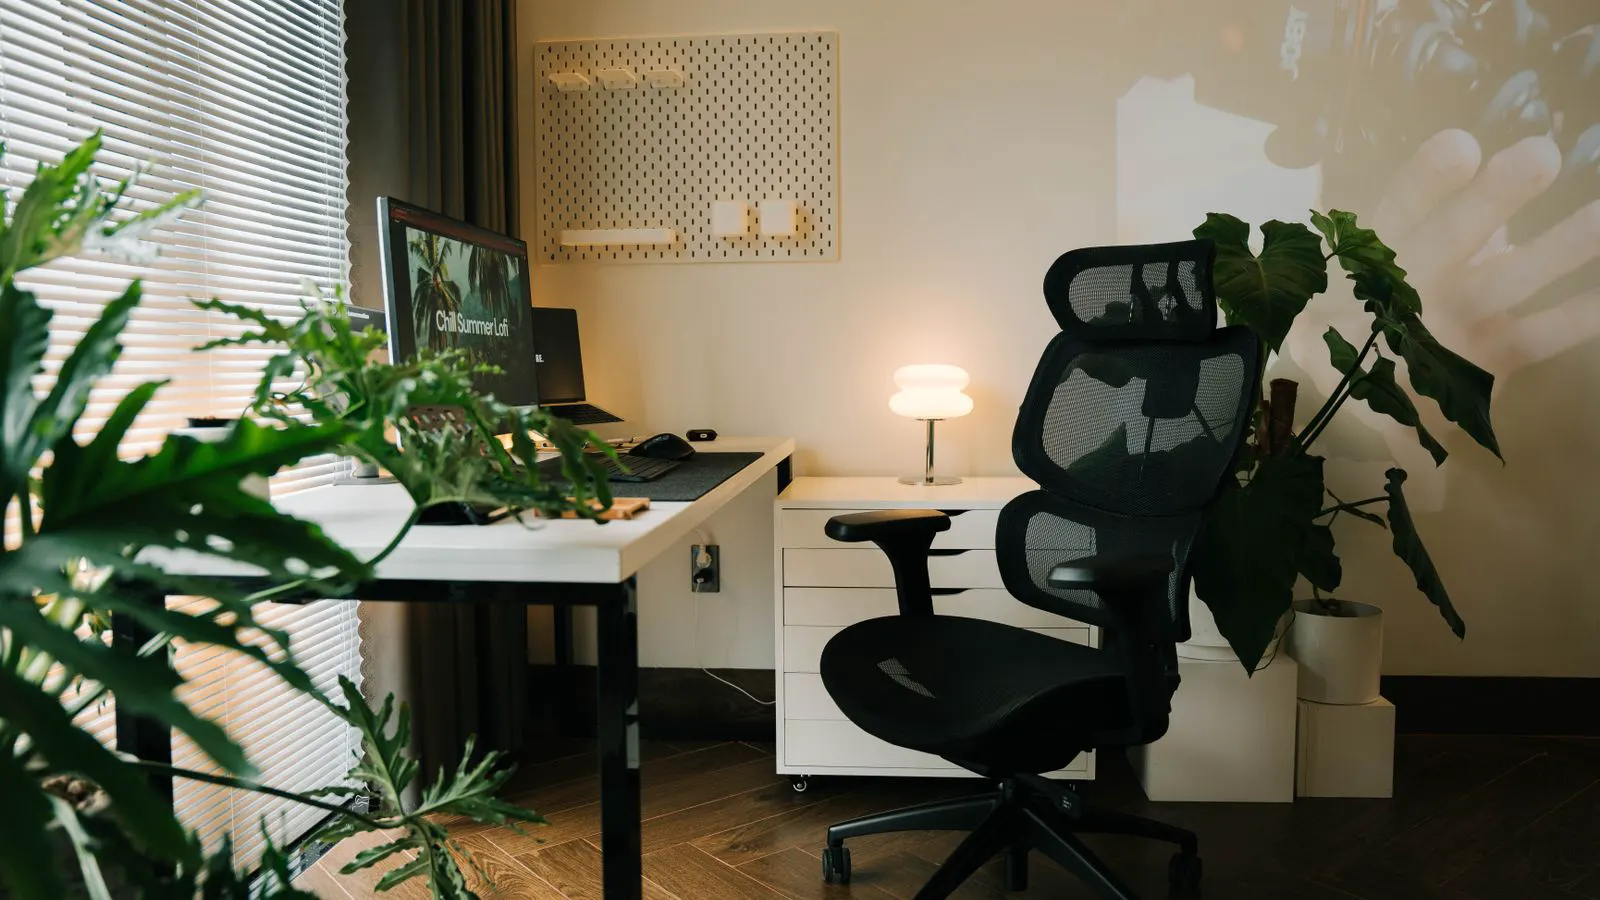
A structured approach to ergonomic chair specification begins with measuring user groups and defining usage contexts. This method moves through material selection, feature prioritization, and vendor verification to ensure the final office furniture specs support long-term comfort and productivity.
- Define user anthropometrics and task duration before selecting chair models.
- Prioritize adjustable lumbar, seat depth, and armrests over decorative finishes.
- Use physical prototypes to validate task chair features before bulk ordering.
- Document all settings and material choices in a single specification sheet for vendors.
- Verify lead times and warranty terms against the selected office furniture specs.
Why Structured Specification Matters
Specifying ergonomic seating for a team is not a product selection exercise. It is a requirements engineering task. Without a clear framework, procurement teams often default to the most visible features or the latest marketing claims. This approach frequently results in chairs that fit average bodies poorly and fail to support specific work postures. A defined method for ergonomic chair specification removes guesswork. It shifts the focus from aesthetics to measurable fit, function, and durability.
When a facility manager buys twenty chairs based on a showroom visit, the result is rarely uniform satisfaction. One user might find the seat too deep, while another struggles with the armrest height. The specification process forces you to define what “comfortable” means before you look at a catalog. It turns subjective preference into objective criteria. This reduces the risk of buying a high-end model that does not match the physical needs of the workforce. It also creates a baseline for future audits and reorders.
Prerequisites: Data and Constraints
Before touching any catalog, gather three core datasets. First, collect anthropometric data for the user group. You need percentile ranges for height, inseam, and arm length. Second, map the work context. Identify the desk height, monitor positioning, and whether users sit at standing desks. Third, set budget and lifecycle constraints. These three inputs form the boundary conditions for every decision that follows.
Anthropometric data should come from HR records or a simple on-site measurement session. If you are replacing existing seats, check the user feedback from the previous installation. Did people complain about their knees? Did they hunch forward? These complaints are data points. For the work context, measure the actual desk height at the user’s station. Do not assume a standard height. Many offices have a mix of fixed and sit-stand workstations. If the user spends more than half their day at a standing desk, the chair must support frequent transitions and quick height adjustments. Budget and lifecycle constraints define the acceptable lifespan. A chair in a high-traffic reception area may need to last ten years with minimal maintenance. A chair in a private office might have a shorter replacement cycle.
Step 1: Define the User Profile
Start by segmenting the team. Not every seat serves the same purpose. A developer working for eight hours at a single monitor has different requirements than a consultant who moves between video calls and whiteboards. Create distinct user profiles for each role. For each profile, note the primary seated posture, the frequency of transitions, and the primary pain points reported in existing facilities. This prevents the trap of buying one model for everyone. It forces you to match task chair features to actual movement patterns rather than assumed needs.
Consider a typical open-plan office. The front-line staff may sit at fixed height desks for long periods. They need a chair with a stable base and a firm seat pan to maintain focus. The project managers in the same office move from their desks to conference tables and then to the kitchen. Their chairs need to roll smoothly and allow for quick height changes. A single profile that tries to serve both groups will fail. The developer’s chair will be too bulky for the manager to maneuver in tight spaces. The manager’s chair might lack the firm support the developer needs for long static periods. Define at least two profiles for most offices. The more diverse the workforce, the more profiles you may need.
Step 2: Establish Anthropometric Ranges
Use the user profiles to set minimum and maximum adjustment ranges. Seat height must accommodate the shortest and tallest user in each segment. Seat depth must allow the user to sit with their back against the lumbar support while maintaining a two to three finger gap between the front edge of the seat and the back of the knee. Armrest height must align with elbow position when shoulders are relaxed. Document these ranges in a specification table. Vendors need these numbers to match models. Without them, you rely on a salesperson’s judgment, which varies by day and by salesperson.
For example, if your shortest user has an inseam of 700mm, the seat height must be adjustable down to a point where the feet rest flat on the floor. If the tallest user has an inseam of 900mm, the seat height must go up to 520mm or higher. The armrest height range should cover the elbow positions of the shortest and tallest user. If you only specify the average, you will exclude the extremes. The shortest user will have to hunch their shoulders to reach the armrests. The tallest user will have to lift them, causing fatigue. Document these ranges clearly. Use millimeters for precision. Vendors can often provide custom height stops if the standard range is insufficient.
Step 3: Prioritize Task Chair Features
Rank features based on impact on comfort and health. The core features for most office settings are adjustable lumbar support, seat pan depth, seat height, backrest tilt, and armrest positioning. Secondary features include headrests, fabric breathability, and castor types. Do not treat all features as equal. A fixed lumbar pad on a high-quality frame often outperforms an adjustable one on a poor frame. Focus on the mechanism quality for primary features. For example, a tilt mechanism that locks in multiple positions is more valuable than a headrest that tilts independently. Create a weighted scoring matrix to compare models against this ranked list.
The lumbar support is often the most critical feature for long-duration sitting. It should be adjustable in height to match the user’s lower back. It should also be adjustable in depth if possible, to accommodate different torso lengths. The seat pan depth is equally important. If it is too deep, it cuts off circulation behind the knees. If it is too shallow, the user slides forward and loses lumbar support. The tilt mechanism allows the user to change posture. A simple tilt is fine for some, but a multi-position lock is better for users who alternate between leaning back and leaning forward. Headrests are secondary. They are useful for users who lean back during calls, but they are not needed for everyone. Do not spend budget on a headrest if the lumbar support is fixed and poor.
Step 4: Select Materials and Durability Standards
Material selection drives longevity and maintenance. Mesh backs offer breathability but can sag over time if the tensioning system is weak. High-density foam provides consistent support but may compress in hot climates. Choose foam densities and mesh tensioning systems that match the expected lifespan of the office. Specify the upholstery material based on cleaning requirements. Leather and faux leather show wear marks but are easy to wipe down. Woven fabrics resist stains but may require professional cleaning. Align these choices with the facility’s cleaning schedule. A durable material that is difficult to clean will degrade faster in a busy environment than a slightly softer material that is easy to maintain.
Mesh is popular because it is breathable. However, cheap mesh can lose tension quickly. Check the warranty on the tensioning system. If the mesh sags within two years, the chair feels uncomfortable and looks worn. Foam density matters. A standard office chair uses foam around 25 to 30 pounds per cubic foot. Higher density foam lasts longer but is more expensive. If the office is in a hot climate, consider a breathable mesh or a perforated foam. For upholstery, check the colorfastness. Light colors show dust and stains more easily. Dark colors can fade in direct sunlight. Test the material in your lighting conditions. If you have a strict cleaning protocol, choose a material that can withstand the cleaning agents used on-site.
Step 5: Define the Office Furniture Specs Document
Compile all decisions into a single document. This specification sheet should list the required adjustment ranges, material types, color codes, and performance expectations. Include a section for environmental controls, such as temperature and humidity, if the facility has extreme conditions. Add a section for accessibility requirements, ensuring the chair meets relevant local standards for reach and force. This document becomes the contract reference. It eliminates ambiguity between what the buyer wants and what the vendor delivers. It also simplifies future reorders when staff turnover requires new seats.
The document should be clear and concise. Use a table format for adjustment ranges. Include the exact model number and configuration. Specify the castor type based on the floor. Hard flooring requires soft castors to protect the surface. Carpet requires larger, harder castors to prevent sinking. Include a section for warranty terms. Define the warranty period for the frame, the foam, and the mechanisms. Specify who is responsible for assembly. Some vendors require on-site assembly. Others ship the chair flat-packed. This document is your legal and technical baseline. Keep it with the purchase order. If a dispute arises, this document resolves it.
Step 6: Prototype and Test
Order samples for each distinct user profile. Do not rely on showroom models. Bring the samples to the actual workspaces. Have representative users sit for at least thirty minutes. Observe how they adjust the chair. Note where they struggle to find a comfortable position. Check if the lumbar support aligns with the natural curve of the spine. Verify that the armrests do not force the shoulders into an elevated position. Record these observations. If a sample fails a critical test, send it back and request a different model or a different configuration. This step catches issues that a specification sheet cannot predict.
The prototype phase is where you find the real problems. A chair might look perfect in the showroom but feel awkward in the user’s desk setup. The desk might be too low, forcing the user to hunch. The monitor might be too high, pulling the head forward. The chair might roll too easily on the carpet. Test the chair in the actual environment. Have the user sit for a realistic period. Thirty minutes is a good start. Ask the user what they changed first. If they adjust the height three times, the default setting is wrong. If they move the armrests, the range might be off. Record these findings. If the prototype fails, do not force a purchase. Return the sample and ask for a different model or a different configuration.
Step 7: Finalize Vendor Requirements
Once the prototype passes testing, lock in the model and configuration. Request a detailed quote that includes delivery, installation, and warranty terms. Confirm the lead time for bulk orders. Ask about the manufacturer’s process for replacing castors or adjusting mechanisms after installation. Verify that the vendor can supply spare parts for the specific model. This step ensures that the chair remains serviceable throughout its life. It also clarifies responsibility for on-site adjustments. Some vendors provide a technician for the first few weeks. Others rely on the building manager to make final tweaks.
The quote should break down costs clearly. Include the cost per chair, the shipping fee, and the installation fee. Check if the price changes with volume. Some vendors offer discounts for orders over fifty units. Confirm the lead time. Bulk orders often take longer. Plan your installation around the delivery date. Ask about spare parts. If a castor breaks, you want to be able to replace it quickly. If a mechanism fails, you want a clear repair path. The vendor should be able to provide a list of common spare parts. This reduces downtime. It also ensures that the chair remains safe and functional. Do not skip this step. A chair that cannot be repaired is a liability.
Common Mistakes in Specification
The most frequent error is specifying for the average user instead of the extremes. If the shortest user cannot reach the keyboard comfortably, the chair fails. Another common mistake is over-specifying decorative elements. Choosing a unique color or a specific fabric weave can double the lead time without improving comfort. Teams also forget to consider the desk height. A perfect chair at a desk that is too low will still cause strain. Finally, many buyers skip the prototype phase. They order based on a 3D render or a showroom visit. This bypasses the most critical validation step and often leads to a large number of returns or complaints.
Specifying for the average user is a dangerous shortcut. The average body may not exist in your workforce. You need to cover the full range. Over-specifying decor is a waste of money. A unique color takes longer to source. A specific fabric weave may not be available. Stick to standard colors and materials unless there is a strong brand reason. Forgetting the desk height is a common oversight. The chair is only one part of the workstation. If the desk is too high, the user has to lift their arms. If it is too low, they have to hunch. Measure the desk first. Skipping the prototype phase is the most costly mistake. It saves time now but causes pain later. The prototype is your safety net. Do not skip it.
Verification: The Final Check
Before signing the purchase order, perform a final verification against the original requirements. Compare the vendor’s confirmed configuration against the specification sheet. Check every adjustment range, every material code, and every included accessory. Have a facilities engineer sign off on the document. Schedule a post-installation audit for the first month. This audit should include a quick survey of user satisfaction and a visual inspection of wear points. If the audit reveals systemic issues, use the vendor’s warranty terms to request adjustments or replacements immediately. This final step ensures that the ergonomic chair specification translates into real-world performance.
The verification step is your last line of defense. Do not rush it. Compare the vendor’s quote to your spec. If the quote says “standard armrests” but your spec says “4-directional adjustable,” stop. Ask for a correction. Have a facilities engineer review the document. They can spot technical errors that a buyer might miss. Schedule the audit. One month after installation, check how the chairs are being used. Are the adjustments within the expected ranges? Are the materials holding up? If there are systemic issues, address them immediately. Do not wait for the warranty to expire. The earlier you fix the problem, the easier it is to resolve.
Reference Table
| Feature | Purpose | Specification Example |
|---|---|---|
| Seat Height | Aligns hips with desk | 350mm to 550mm range |
| Lumbar Support | Maintains spinal curve | Adjustable height and depth |
| Seat Depth | Prevents knee pressure | 380mm to 500mm adjustable |
| Armrests | Supports forearms | 4-directional adjustable |
| Castors | Mobility and floor protection | Soft floor, low noise |
| Tilt Mechanism | Posture variation | Multi-position locking |
Frequently asked questions
How do I decide between mesh and fabric backs?
Mesh provides better airflow for users who sit in warmer environments or wear thicker clothing. Fabric offers a more uniform surface and may hide wear patterns better. Choose based on your facility temperature and cleaning protocols.
Is a headrest necessary for office furniture specs?
A headrest is optional for most task seating. It is useful for users who recline frequently. If the chair is primarily for upright work, the cost of the headrest may be better spent on a higher quality tilt mechanism or lumbar support.
What is the best seat height range for a team?
There is no single best range. Measure the inseam of your shortest and tallest users. The seat height range must cover the distance between the floor and the hip joint for both extremes. Typical office ranges start around 350mm and go up to 550mm or more.
How should I document the specification for vendors?
Use a single document that lists all required dimensions, materials, and performance criteria. Include a prototype reference number. This prevents miscommunication and ensures the delivered product matches the tested model.
Can I use the same chair for all employees?
It is possible but often suboptimal. Different roles involve different postures and durations. A single model may work if the adjustment ranges are very wide. However, multiple models tailored to specific user profiles usually provide better long-term comfort and reduce health-related complaints.